Creating a beautiful, low-maintenance lawn is easier than ever with Alliance Gator X-Turf. Whether you're upgrading your backyard, creating a pet-friendly space, or adding greenery to a commercial property, proper installation is the key to long-lasting results.
Why Choose Alliance Gator X-Turf?
Alliance Gator X-Turf is designed to provide a lush, natural-looking lawn without the maintenance of real grass.
Key Features:
-
Durable C-shaped blades help reduce matting from foot traffic
-
Excellent water permeability for fast drainage
-
Suitable for residential and commercial applications
-
Free from heavy metals and harmful substances
-
Fire-resistant for added safety
Designed for both indoor and outdoor installation
Materials You'll Need
-
Alliance Gator X-Turf
-
Crushed stone base
-
Landscape fabric (optional)
-
Plate compactor
-
Utility knife
-
Turf nails or landscape spikes
-
Joining tape and adhesive (for seams)
-
Alliance Gator Beige Infill Sand
-
Broom or power brush
Step 1: Prepare the Area
Remove all existing grass, weeds, roots, and debris from the installation area. Excavate approximately 3–4 inches of soil to create room for the base materials.
Ensure the area is graded properly to allow water to drain away from structures.
Step 2: Install the Base
Spread and compact 3–4 inches of crushed stone to create a stable foundation. Compact the base thoroughly using a plate compactor until the surface is firm and level.
A properly prepared base helps prevent settling and ensures a smooth finished appearance.
Step 3: Add Landscape Fabric
Install landscape fabric over the compacted base if desired. This helps reduce weed growth while still allowing water to drain through the surface.
Step 4: Roll Out the Turf
Unroll the Alliance Gator X-Turf and allow it to sit in the sun for a few hours. This helps relax the material and remove wrinkles from shipping and storage.
Position the turf so all blade directions face the same way for a uniform appearance.
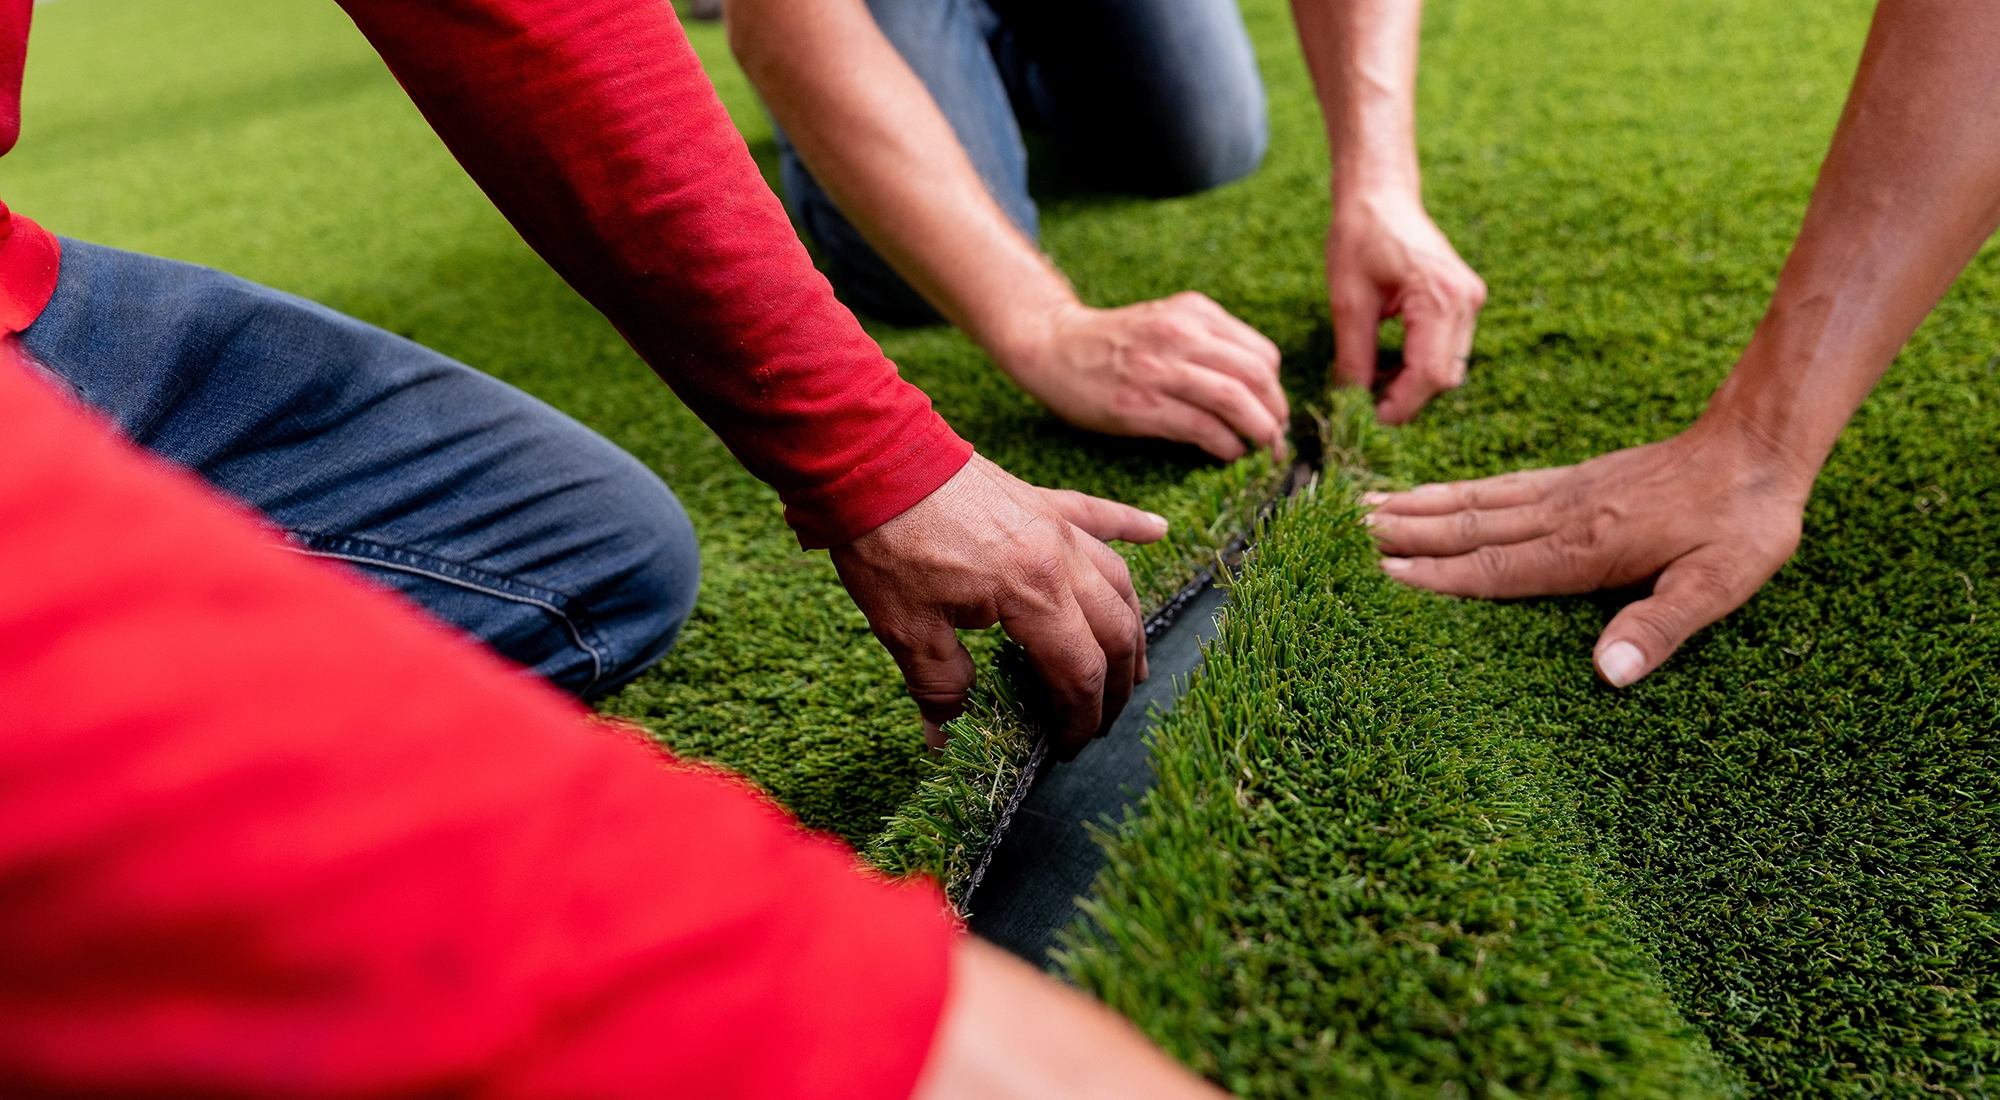
Step 5: Cut and Fit
Using a sharp utility knife, carefully trim the turf around edges, pathways, garden beds, and other obstacles. Take your time to ensure clean, precise cuts.
If multiple pieces are required, position the seams tightly together without overlapping.
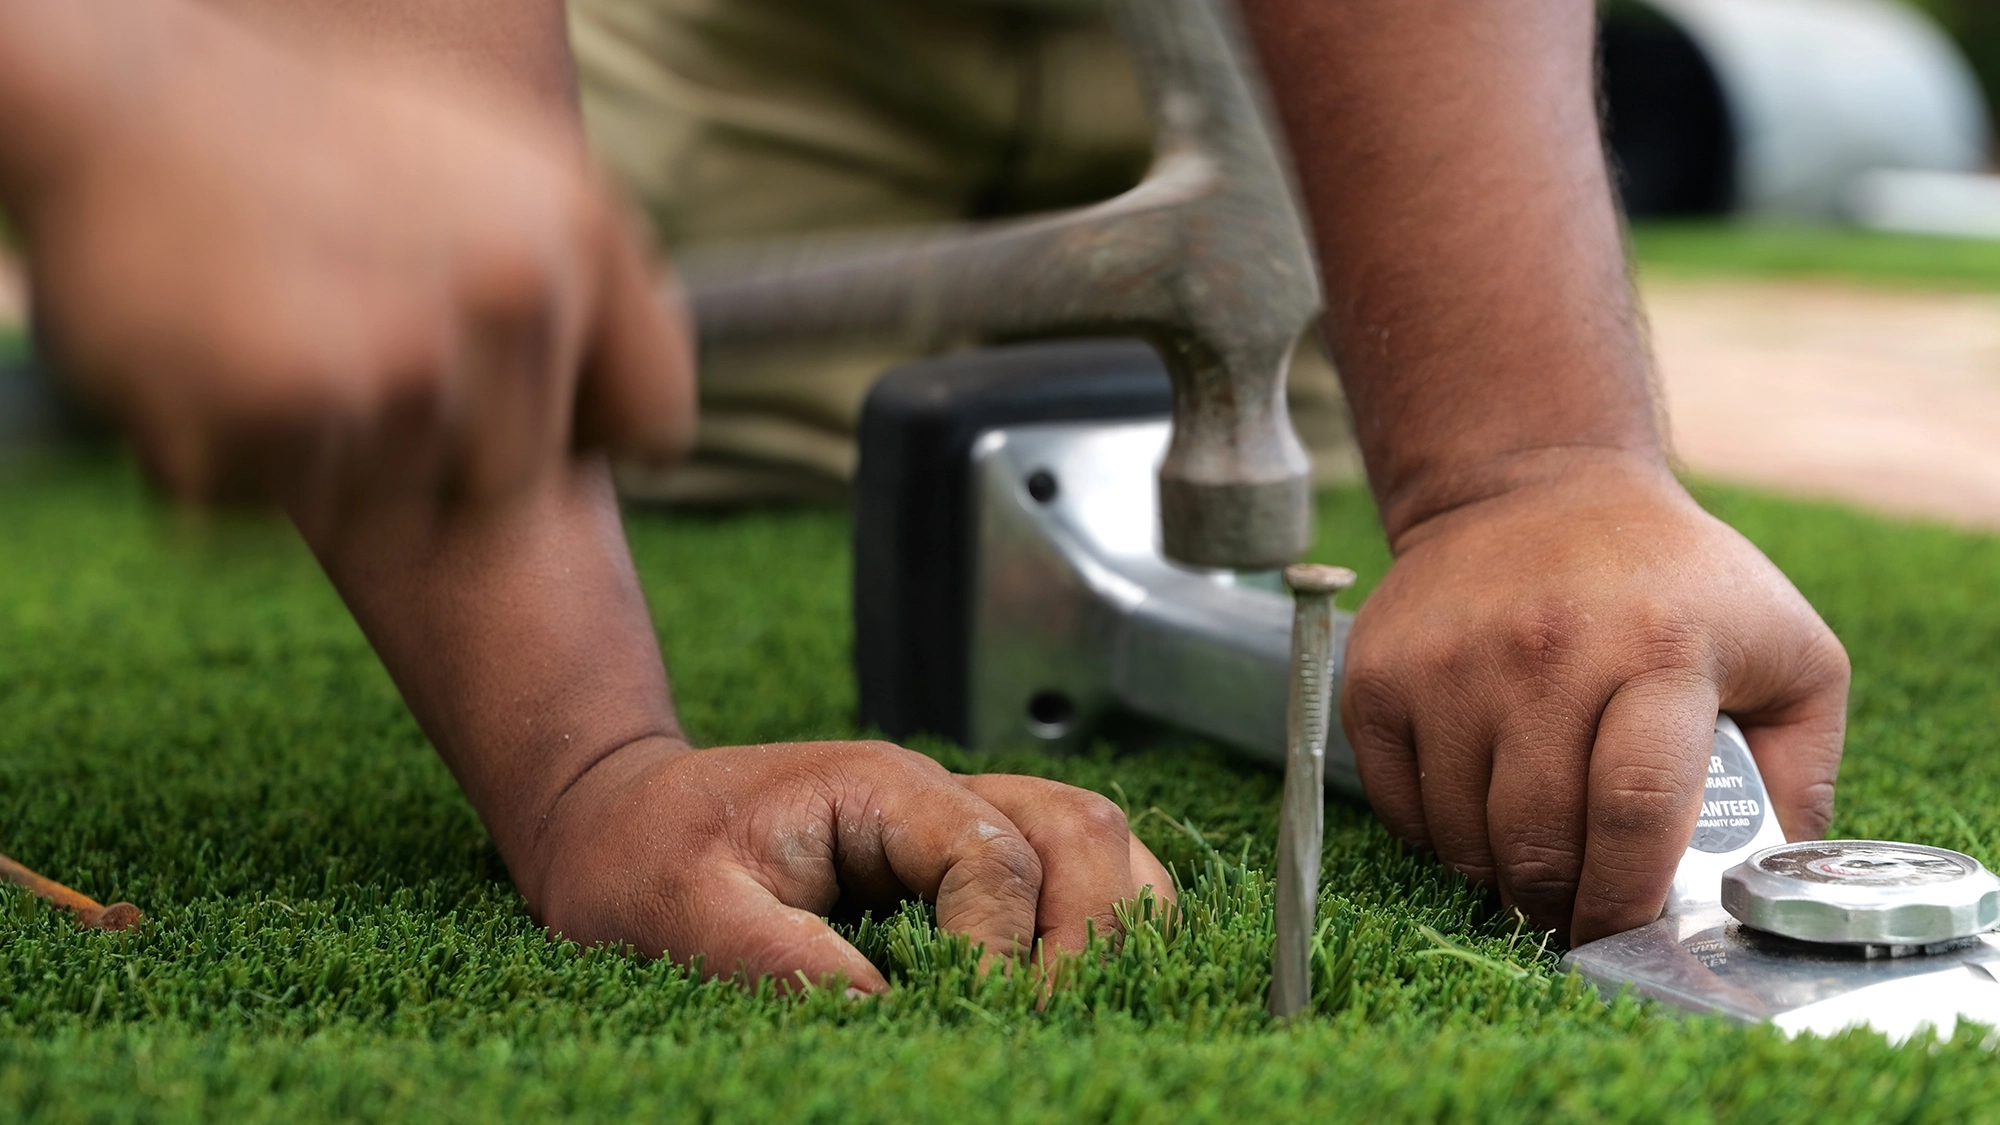
Step 6: Secure the Turf
Fasten the turf around the perimeter using landscape spikes or turf nails every 6–8 inches. Additional fasteners may be required in larger installations to prevent movement.
For seams, use joining tape and adhesive to create a secure, nearly invisible connection.
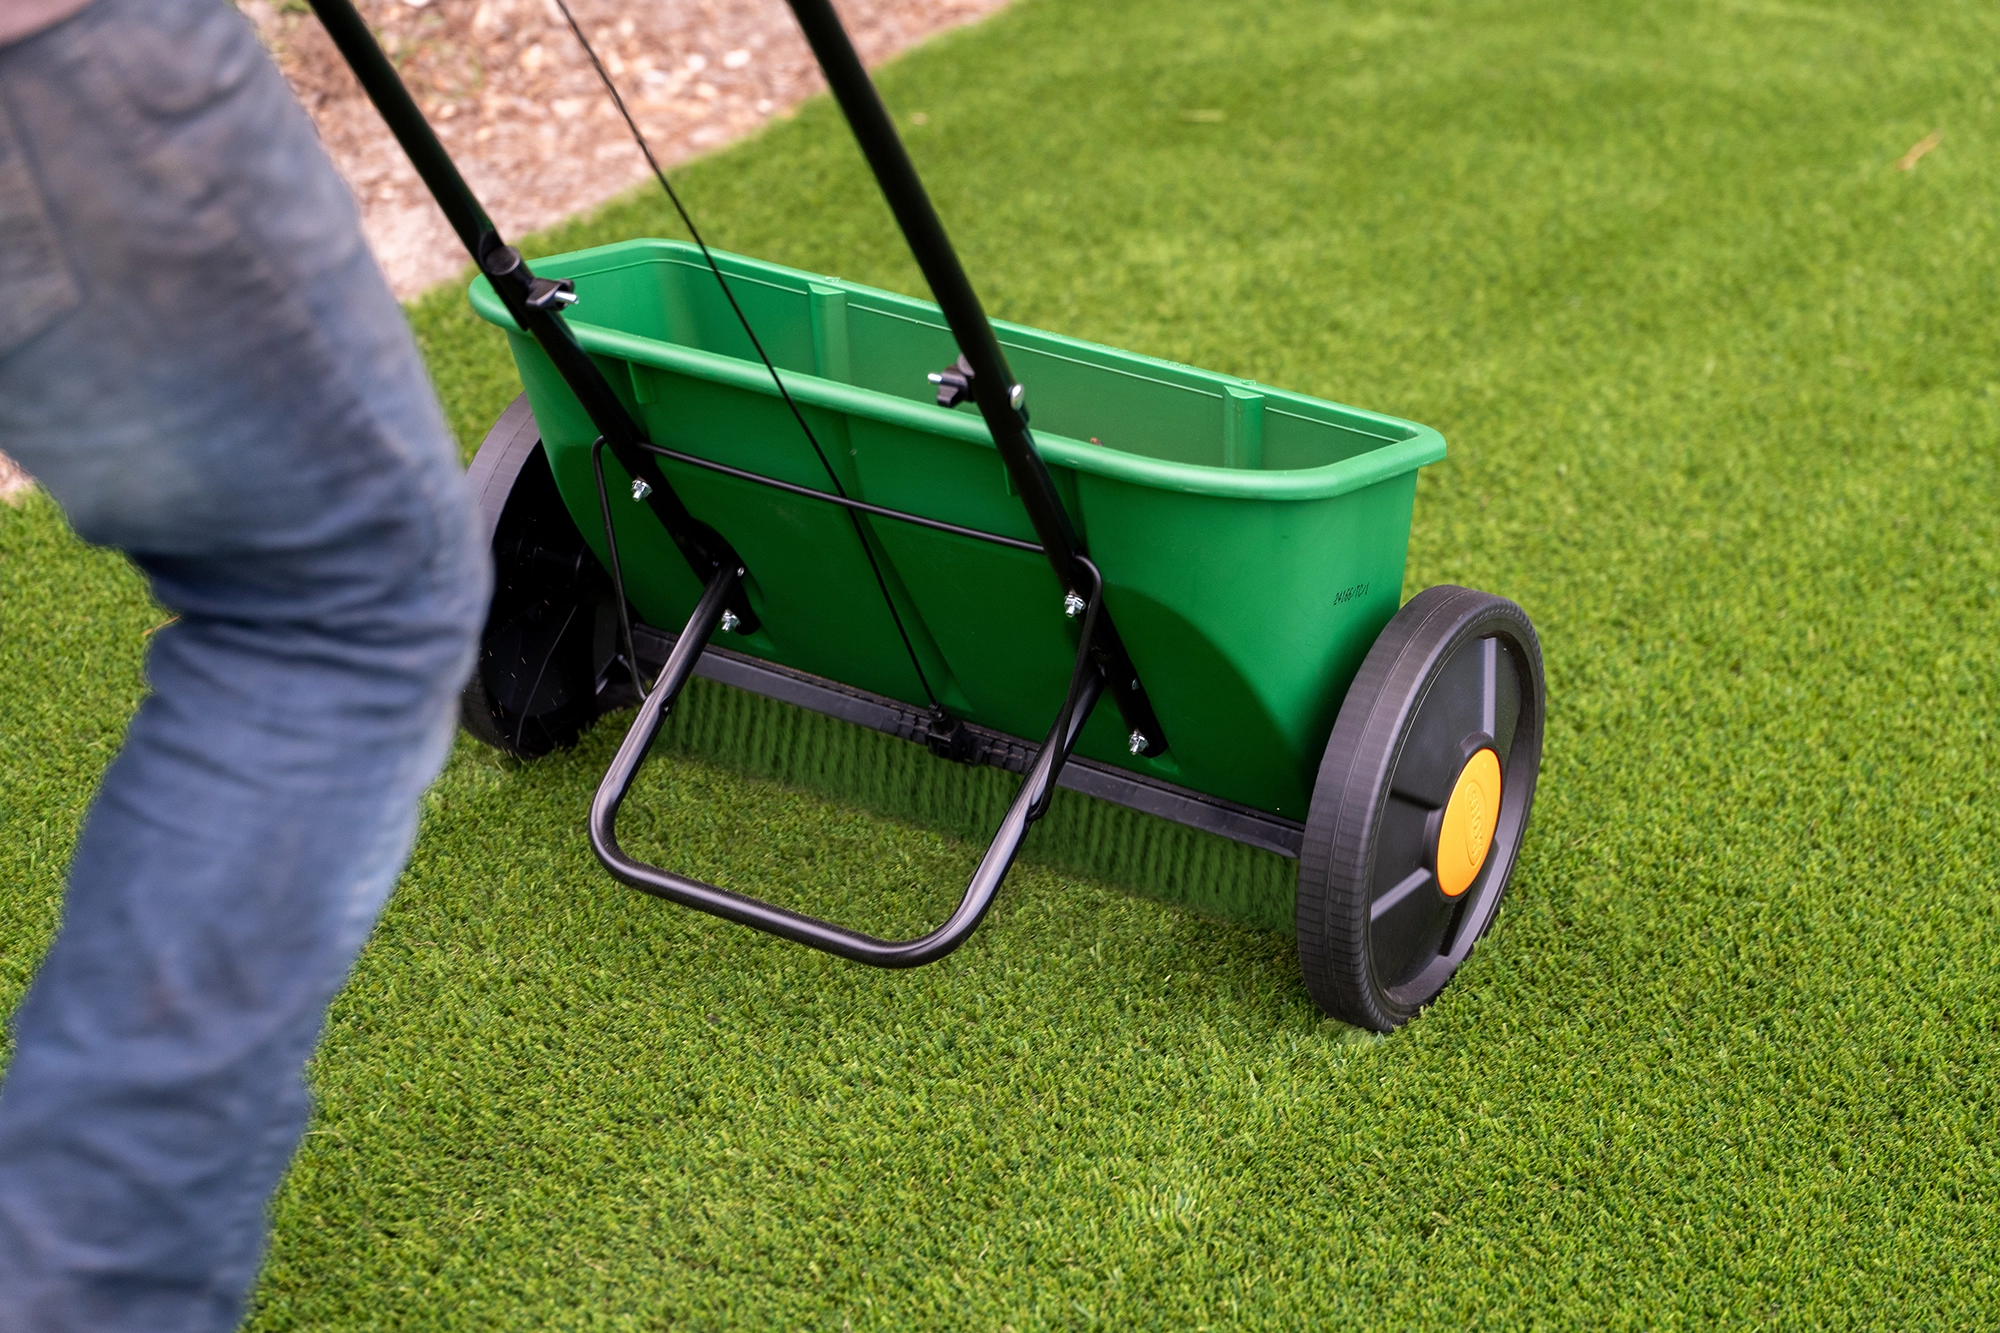
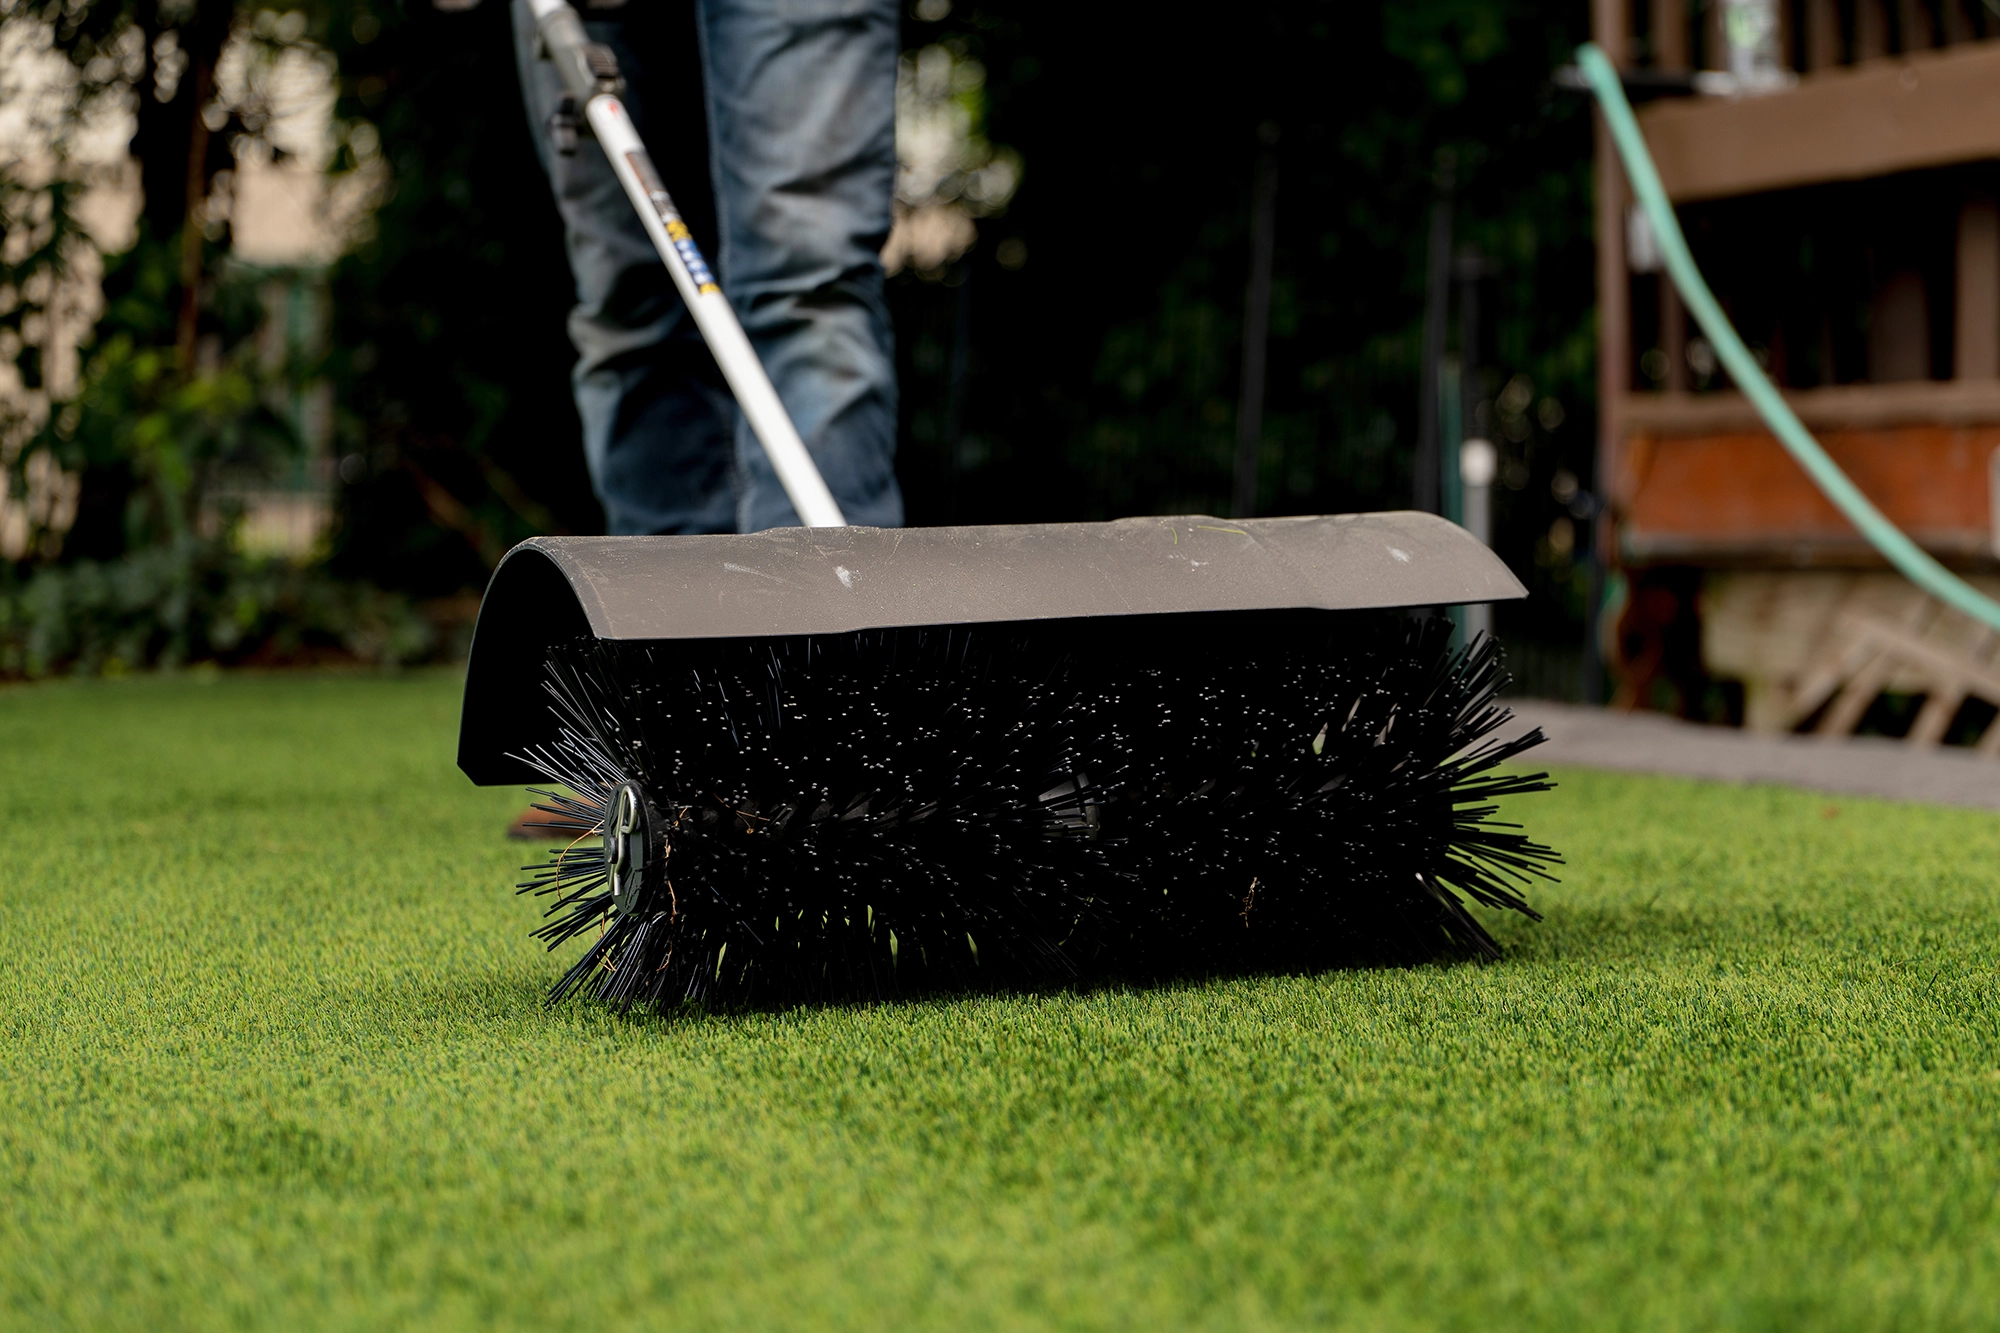
Step 7: Apply Infill
Spread Alliance Gator Beige Infill Sand evenly across the turf surface. The infill helps:
-
Support turf blades
-
Improve durability
-
Enhance drainage
-
Reduce wrinkles and movement
-
Extend the lifespan of the turf
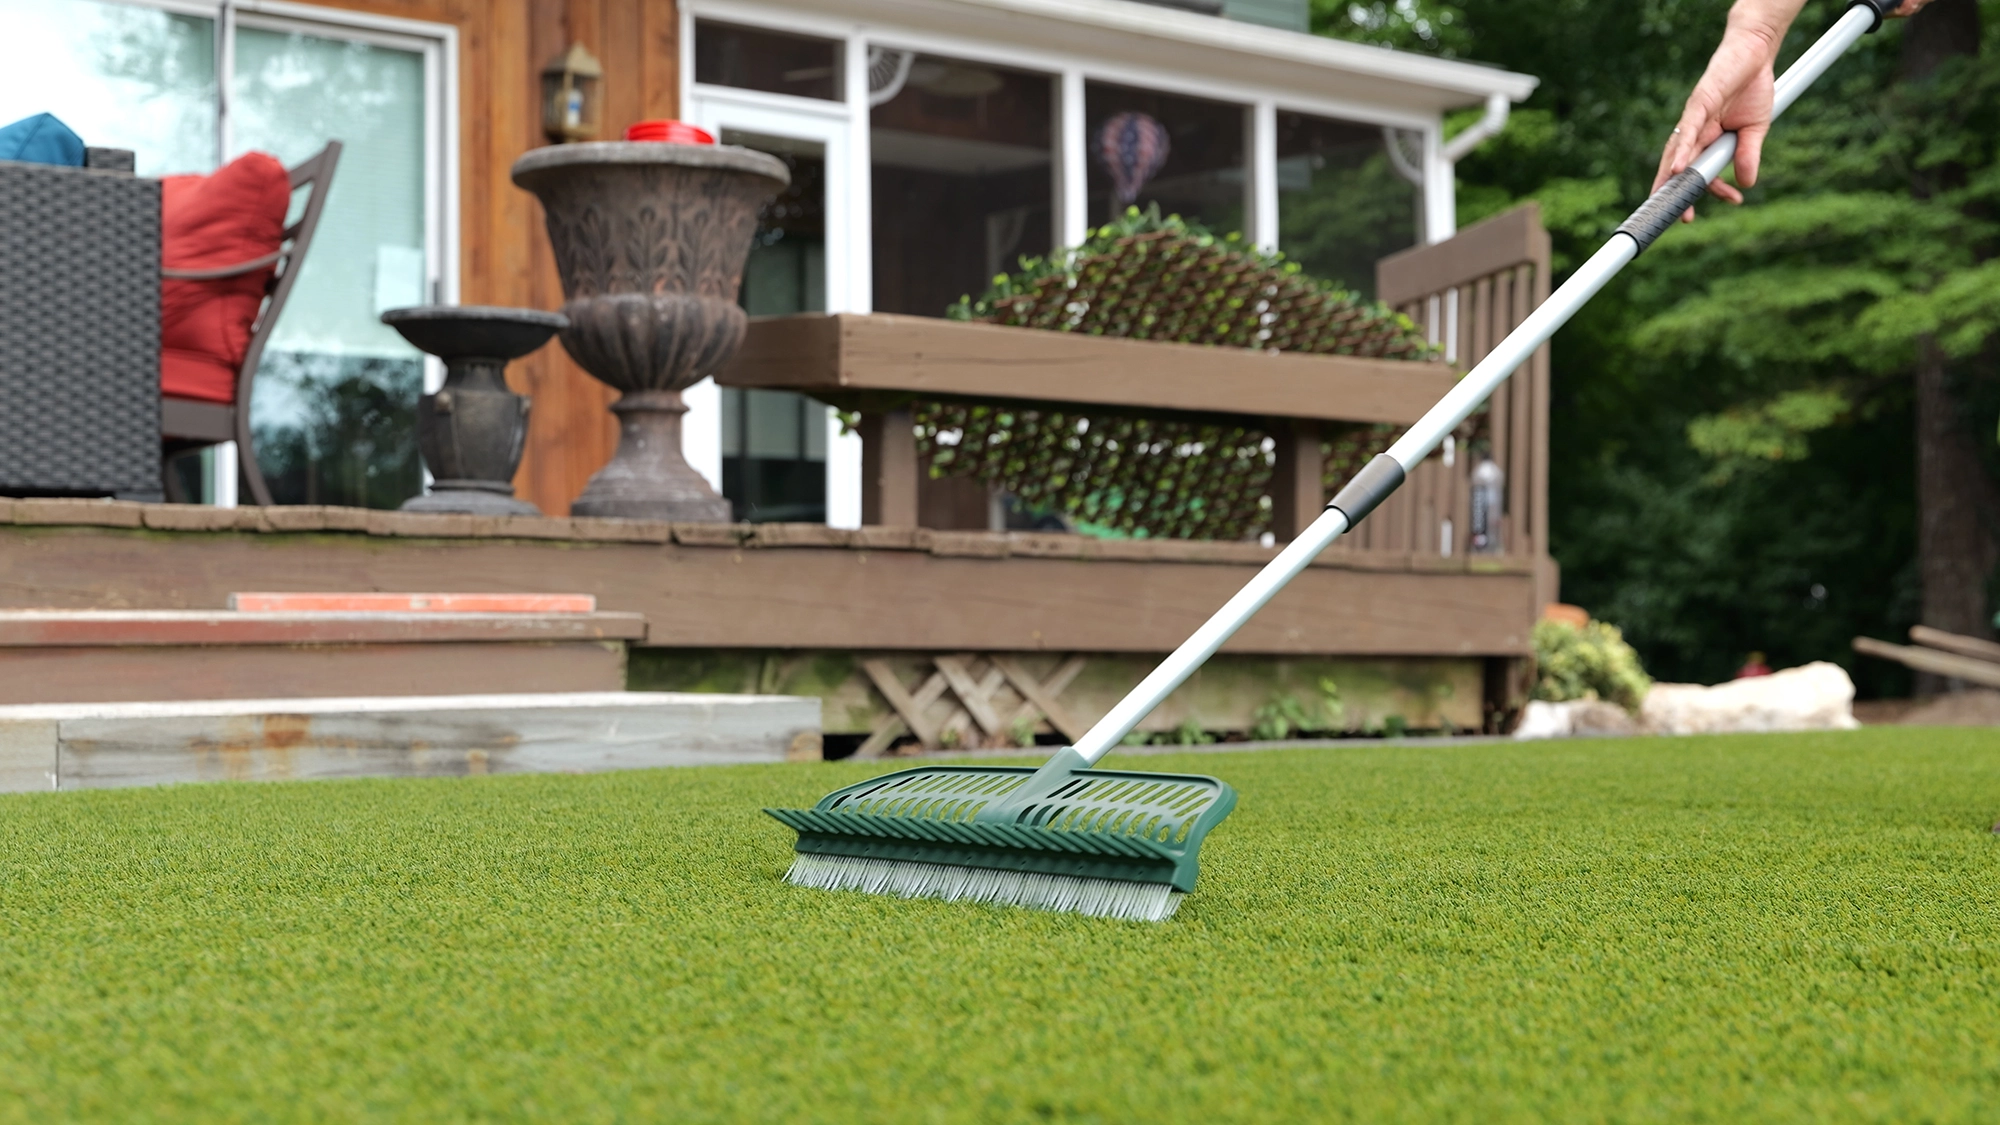
Use a broom or power brush to work the infill deep into the fibers.
Step 8: Brush and Enjoy
Brush the turf fibers upright to create a natural appearance. Inspect the surface for any loose edges or low spots and make adjustments as needed.
Your new lawn is now ready to enjoy without mowing, watering, or fertilizing.
Complete Your Outdoor Space
Pair your new artificial turf installation with Permacon 60 Melville Slabs to create stunning patios, pathways, and outdoor living areas. Their clean lines, large-format design, and modular sizing make them an excellent complement to modern and contemporary landscapes.
Together, Melville Slabs and Alliance Gator X-Turf create a beautiful, durable, and low-maintenance outdoor retreat that can be enjoyed season after season. Shop Premium Artificial Turf & Hardscaping Materials at https://www.ritchiefeed.com/